Pumpkin Shape Matching
by Jennifer (Ohio)
Another Contribution Posted For You
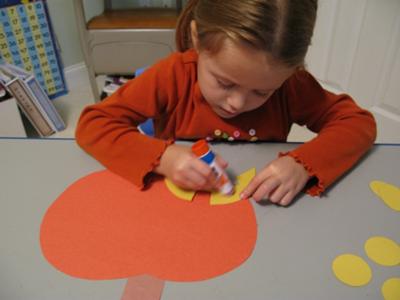
Pumpkin shape matching
1. Cut out pumpkin shape and stem; attach stem to back of pumpkin.
2. Cut out small black shapes of your choice, 3 of each shape(3 circles, 3 triangles, 3 rectangles, etc.). These are the shapes used for the pumpkin's eyes and nose.
3. Cut out yellow shapes, slightly larger than the black shapes, that the child will match to the black shapes.
4. Cut out a yellow pumpkin mouth and allow child to glue it onto the front for the face.
Pumpkin Shape Matching Sent In So Your Toddler Can Enjoy


5. With a small piece of tape, attach one set of black shapes (i.e. 3 diamonds) for the eyes and nose of the pumpkin.
6. Allow the child to select the matching yellow shapes to place on top of the black shapes.
7. Continue this with all of the black and matching yellow shapes.
8. Do a few "mixed up" pumpkins with three different shapes for the eyes and nose.
9. After the child has matched all the shapes, allow him/her to select their favorite yellow shapes to glue on for a "final" face.
To Help Busy Mums and Dads Here Are Some Related Shopping Items
When you purchase from this link, you are actually purchasing from Amazon.com, and you can have peace of mind that your order will be processed by Amazon’s secure order server.
Have An Easy Toddler Craft To Share?
Do you have an easy toddler crafts to share?
Other craft pages for you
Home l Star of Bethlehem Craft l Toddler Thanksgiving Craft l Thanksgiving Activities l Toddler Interest Books l Toddler Painting Crafts l Toddler Craft Books l Toddler Painting Tips l Toddler Activities l Bible Craft Index l Egg Carton Worm l Sock Worm Craft l Toilet Roll Butterfly l Grape Printing Craft l Sea Anenome Craft l Toddler Box Crafts l Toddler Housekeeping Play l Development l Toddler Crafts l Seasons Crafts l Baby Activities l Homemade Racetrack |


New! Comments
Have your say about what you just read! Leave me a comment in the box below.