Christmas Crafts & Activities
Remember how much you had creating Christmas art projects? Nothing brings out the kid in you better than sharing some together time with your own children and there’s no better time to do it than during the holiday season! Start the season with some cute and fun to make crafts for Christmas that your kids will love.
Christmas Party Time For Kids
Christmas Crafts & Activities
Christmas Party Time!
The Christmas party is something all preschool kids look forward to. Here are some Christmas games to play.
- Play pin the nose on Rudolph
- Play musical chairs, using jingle bells or any Christmas song for the music.
- Play charades. Kids are very animated, and would love this game. Choose Christmas-related words like: gift, Santa, elf, tree, Snowman, etc.
- Play “Santa Says” – a fun Christmas version of “Simon Says” for kids.
- Have a sing-a-long to the Christmas music.
- If any child can dance or sing, invite him/or her to give a performance.
- For the big finale, have an adult dress up as Santa Claus and hand out Christmas stockings to each child. Ensure the child’s name is on each stocking. Fill the stockings with goodies, such as: candy; small dolls; toys, or whatever is fitting, but inexpensive.
- Take pictures as Santa hands out the presents. Have several copies made for the kids so they will have a lasting memory of the party.
Whatever Christmas party ideas for kids you select, you can be sure that anything you do will not only be appreciated, but will give all the kids an opportunity to have a great time with their friends.
For Christmas Crafts How About Something For Those Less Fortunate
Christmas Crafts & Activities
Stockings for Those Less Fortunate
Giving to others and helping the less fortunate is one of the most important things to teach young children at Christmastime. Beginning this giving tradition at a young age sets a foundation for the rest of their lives. Preschoolers have no greater pleasure than knowing the have made someone smile and laugh. Why not start a toy drive with your preschoolers? Try this idea to help keep it fun and inexpensive for everyone involved.
Everywhere there are people collecting toys for children at Christmas. Most of these are large toys handed out to children on Christmas Eve. This year have your preschoolers change this tradition a little bit. Have them give out Christmas stockings.
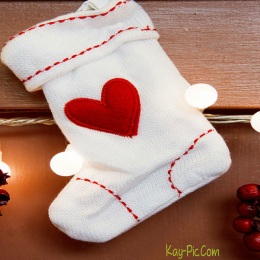
Start with some inexpensive Christmas stocking. They don’t have to be fancy. Plain red and green socks made of felt will work. They also don’t have to be very large. There will be plenty to put in them but nothing very big and extravagant.
Let the children decorate the socks. Give them washable markers, stickers, pictures of Christmas items such as Christmas tree, Santa and reindeer. They will also need some snow glitter and glue.
At the top of each sock you can stencil the words Merry Christmas. This will keep the preschoolers from wanting to put someone’s name on the sock like the one they may have at home. They can color the letters in with a marker if they would like to give a more festive look.
Let the children decorate the socks. They can use markers if they want to draw pictures on the sock. This can be a little frustrating sometimes so if you feel markers are not the right item to use then there are other items the children can use quite easily.
Stickers work well on felt if a little glue is applied to the back. There are many types of Christmas stickers available. Even the tags you put on packages will work. Just be sure to cut off the to and from part on the tag.
Pictures cut out of magazines or from old Christmas cards also work well. You may be able to find things in pictures that you would not be able to find on stickers or tags. These can also be glued to the stocking very easily.
Lastly, add some white or iridescent glitter to the stocking. There are glitters that look like snow available for that final touch.
As for collecting the toys. What do we usually find in a Christmas stockings? Fun little things that give the children some momentary enjoyment. Have some of the children bring in candy. Have the rest bring in small inexpensive toys. These toys can be from the party section at the local department store or even from the local dollar store. The items don’t have to be extravagant, just a few inexpensive toys that will give less fortunate children something to enjoy at Christmas.
Once you have collected all the items let the children help you stuff the stockings. This will give them a sense of helping like Santa’s little elves. Once the stocking are all stuffed you can take a field trip to the local hospital, to a shelter for children or even to Social Services where the children can leave their socks for Santa to hand out on Christmas morning.
Christmas Homemade Cards
Christmas Crafts & Activities
Homemade Christmas Cards
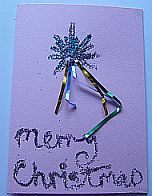
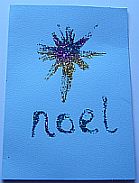
Everyone loves to receive Christmas cards. That first Christmas card in the mail really signifies that the holiday season has arrived. Children are the best at making homemade cards and they delight in giving them to their parents, grandparents and teachers. Help your preschoolers make some cards to take home for family members to enjoy and cherish for years to come.
You will need construction paper, old or new Christmas cards, colored pencils, crayons, glitter pens, scissors and glue sticks. With a little help from you, your preschoolers will have a ball making these wonderful homemade cards.
Start by taking the piece of construction paper and folding it the middle. This is the actual card for the children to add their touches too. Be sure to crease the card well for them. This will ensure they understand that it is a card like the ones they are used to seeing in the store or at home. Explain that the front is decorated with Christmas items and the inside is for other small decorations, a short note and their signature.
More To Explore;
Have them look through your old Christmas cards and find pictures they like. Help cut them out and paste them to the front on their card. They can even cut out words from different cards to express their own Christmas wishes on their card. After the picture is attached they can add glitter with the glitter pen to the front of the card. Some glitter is made to look like snow so they can even have a snow effect added to their card if they like.
On the inside they can paste more pictures and sayings clipped from the old Christmas cards. Some of the children may want their own words written in the cards. With your help they can accomplish this. Be sure they sign the card themselves.
On the back of the card be sure to put the year. Parents and grandparents love to keep these little momentums. Someday they will want to pull them out and show them to a new in-law or their own grandchildren. The date when the card is created is very important years down the road.
If your preschoolers have pictures of themselves these can also be glued to the back of the card. This will also help parents in later years to remember this special card and the wonderful Christmas when they received it.
Once the cards are finished, let the children take them home. They will love the idea of making their very own Christmas cards and handing them out to their family and friends. The smile on Mom or Dad’s face when their child hands them their homemade Christmas card will last in the young child’s mind for years to come.
How About A Cozy Homemade Fireplace
Christmas Crafts & Activities
Cozy Homemade Fireplace
It’s a wonderful experience gathering around the fireplace, sipping hot chocolate and reading “Twas the Night before Christmas.” During December you can do the same in your preschool classroom. Have your students make a homemade fireplace you can set up and gather around and read wonderful Christmas stories by.
To make your fireplace you will need a large box. It can be square or rectangular. You will also need a piece from a cardboard box that is wider than this box to make the mantle. Next gather up black, gray, red, yellow, orange and brown paint, paintbrushes, paint shirts, and a few empty toilet paper and paper towel rolls.
Cut out the fireplace and add the mantel before you let the children start the painting. This is easy to do. In the large box start at the bottom and cut out an area that will be used for logs and fire. Now take the larger piece of box and place on the top of the fireplace. This piece needs to hang about 6 inches out from the top of the fireplace box on the front and both sides. Once you have it attached fold about 3 to 4 inches of the box down over the front and sides of the fireplace box to make the mantel. On the front of the fireplace box draw rectangles (bricks) for the children to paint red. Be sure to leave a small amount of space between each one to look like the brick mortar.
Now it’s time for the real painting fun. Be sure all the children have paint shirts to save clothing from being ruined. Start by having them paint the bricks red. This will give your fireplace an authentic look.
Once the bricks are all painted, next have them paint the flames on the back of the inside of the box in the cut out area. They can paint red, yellow and orange flames and as many and as high as you want them. When the flames are painted it’s time to paint the bottom of the box where the logs will lay black with bits of gray for ash giving your fireplace a well used look.
To make the logs the children can paint the toilet and paper towel rolls brown. This will give your logs a realistic look when placed in the fireplace. Be sure to place the logs so that the flames painted on the back of the fireplace look to be coming directly from the logs. Glue the logs to the bottom of the fireplace and to each other.
Have the children paint the mantel red. Add some garland to your mantel and place red bows along the garland. For the final touch have the children decorate Christmas socks and attach them to garland.
Now you have a comfy, cozy fireplace to sit around and read those wonderful Christmas stories by. Be sure the kids all have a soft place to sit and possibly lay back as naps might be in their future with a fireplace like this.
Christmas Would Not Be Christmas Without Caroling
Fun Christmas Crafts & Activities
Go Christmas Caroling
We all like to sing Christmas songs. It gives us a warm feeling and puts us right in middle of the Christmas spirit. Children of course really like to sing and dance around, so why not take your preschoolers Christmas Caroling this year?
There are many Christmas songs that preschoolers can learn the words to without much trouble. Songs like Jingle Bells, Rudolph the Rednose Reindeer and We Wish You a Merry Christmas are very simple and easy to learn and remember. Teach these songs to your preschoolers and practice with them everyday until they know the words.
Once the kids have learned these simple songs then you can all go caroling. There are many places you can take the kids to carol. Start right in your own school. If you are in a school that has other grades included have the children walk through the halls and into the other classrooms singing their Christmas songs.
If you are a single preschool with no other grades included then take your preschoolers caroling outside of school. The can walk around the area of the school singing or even up to the doors of people who live right in the area and carol. It will delight the neighborhood to have carolers during the day and especially if they are children who are spreading the Christmas joy.
You can also take your preschoolers to places like the local hospital or nursing home. Many children are in the hospital during Christmas. They would enjoy having other children come to them singing Christmas songs to brighten their time in the hospital. Going to the local nursing home can also be a lot of fun. Many nursing homes have a common area where the children can go and sing. The elderly who live there will be thrilled not only to hear the songs but to also have the children come to their home and sing.
When you are finished caroling take the children back to the school and enjoy some hot chocolate and cookies. What a great way to finish off their caroling experience.
Caroling is a way to for your preschoolers to spread their Christmas spirit and have fun at the same time. By spreading their joy they will bring light to the life of many people who may not have otherwise had anything to look forward to this Christmas.
A Christmas Scrap Is Fun To Make, And A Keepsake
Christmas Crafts & Activities
Making A Christmas Scrapbook
Preschoolers really enjoy making things with their own hands. They also enjoy giving those types of things to the special people in their lives. Making a Christmas scrapbook can be easy and fun. It’s the perfect gift for a child to give Mom, Dad or Grandparents. With your help they can make their very own scrapbook.
Scrapbooks are simple to put together. First have the preschooler’s child decide how many pages they would like in their scrapbook. Encourage them not to make it to big. Also they need to determine how large they would like the scrapbook to be. Use the construction paper and cut out different sizes to show them the different sizes they can choose to make their scrapbook.
Start with either red or green construction paper to make the outside of the scrapbook. This will be the front and back covers. Let the kids decorate them however they like. They might draw pictures, use the glitter glue or just simply paste pictures cut from old cards onto the front.
Use the other color of construction paper for the pages. Be sure to cut them all the same size so their scrapbook fits together correctly. Use the front cover piece as a template to cut around.
Once the pages are all cut you can put the scrapbook together. Use the hole punch to help them place three holes in the side of each piece of construction paper. Lace the yarn through the holes and tie them off with a bow. Preschoolers may need help tying their bows.
Now let them create their scrapbook. Have them bring pictures from home the can use. Preschoolers may just want to place a picture or two in and then finish it off with pages they have colored or decorated themselves.
If they have a paper, such as printing their ABC or their numbers and they are proud of it let them add that to their scrapbook. Anything that will show the person who is receiving the scrapbook the life of the child who is giving it.
Making a scrapbook can be fun and exciting for children of all ages because it’s about them and what’s important to them. Giving them as gifts to the people they care about is a way of showing their love and appreciation. It’s a book of memories that can be added to each year.
Make An Easy Picture Puzzle
Fun Christmas Crafts & Activities
Making A Picture Puzzle
Creating a picture puzzle is pretty simple. With some help children of any age can create a puzzle of themselves or their family. Once the puzzle is created they can give them to Grandparents or even send them to family members whom they may not see at Christmas time.
You will have to ask the parents to send a picture of the child or the child’s family. Let the parents know it won’t be destroyed in anyway and will be returned as soon as the project is completed.
When the children bring in the pictures place them on a copy machine and enlarge them. Make sure they are not too big. Being able to tell who the people are in the picture is what’s important.
Once you have enlarged all the children’s picture then they can begin to make their puzzles. You will need pieces of cardboard cut to the same size as the pictures. Have the children use the glue stick and cover on side of the cardboard with the glue. Help them attach the picture to the cardboard. Children will need to cover their cardboard and picture with wax paper. Then they can place a large book on top of the picture to leave overnight while the glue dries.
The next day, have the children uncover their puzzle carefully. They don’t want to take chance on tearing any of the paper that might be sticking out over the edge of the cardboard. Help them trim any excess paper away. There should be too much. When that is complete help them cover the front of the puzzle with a clear coat. Show them how to use a paintbrush and paint it on. They will have a ball doing this and it won’t hurt anything as long as you have the area and the children’s clothes covered. Again they will have to let it set over night to dry.
When the puzzle has completely dried turn it over so the cardboard side is facing out. Let the children use pencils to draw the puzzle piece shapes. The can be big, little however they like. You may have to help with the areas that need to be cut in or sticking out but once you show them they will pick up on it very easily.
Once they have the puzzle pieces drawn all that needs to be done is the pieces cut out. Help them with this if they are struggling. It can be hard for small children to use rounded end scissors to cut through something like cardboard. You can use an Exacta knife to cut the piece out with if you like but do this yourself to keep the children safe.
Once the pieces are cut the children have a puzzle of themselves or their family to give to someone special in their life. Won’t they be excited to have a puzzle made with little hands that they can treasure for a lifetime?
Make Your Own Christmas Tree Ornaments
Fun Christmas Crafts & Activities
Homemade Foam Christmas Tree Ornaments
Children love to create things. With preschoolers this can sometimes be tough. They aren’t coordinated enough to use scissors and markers well they are just out of the question. Foam can be a fun and creative way for preschoolers to make decorations themselves.
Finding foam cutouts isn’t too difficult anymore. Most craft stores carry such items. They are easy to work with no matter what the child’s age is. They just punch them out of the foam and then decorate them if they like. They also can be found in large packages that aren’t very expensive.
The children will find Santa Clause, reindeers, elves and many other Christmas cutouts. They will be excited about punching them out and creating their very own Christmas ornament.
Ask the parents to bring in a picture of their child. Let them know that it will be destroyed or at least part of it will. Explain to them why you’re asking for the picture. They will understand and be glad to help in any way they can.
Help the children cut their faces out of the picture. All they need is just their head. With a glue stick show them how to place glue to the back of the picture and then attach it to the head of the foam cutout.
When the glue has dried they can carefully place a hole in the top of the ornament. Add a piece of ribbon through the hole and tie it in a bow. Add a hook and hang it on the tree.
Won’t the kids have fun looking at each other’s ornaments and seeing who is Santa and who is a reindeer? These types of ornaments are keepsakes that can be used year after year to remind us of the joy each child has brought to our life.
A Present For Mom?
Fun Christmas Crafts & Activities
A Christmas Bouquet For Mom
Children like to give gifts especially to their Mom. How many Mom’s will receive a bouquet this Christmas? Probably not too many we would guess. Help your preschoolers create the perfect Christmas bouquet to take home to Mom for the holidays.
You want as many different colors of candy canes as you can find. You can buy them at the dollar store in boxes of twelve and they are pretty inexpensive. Be sure to have a few extra just in case. You never know who might get a little hungry while working so hard.
Have the kids pick six different colored candy canes. They can mix up the colors or use the same color for all their candy cane flowers. Either way is fine as long as it’s made with their love. They will want to make sure the hook of the candy cane is sticking out towards them. Use a twist tie and help them tie their candy canes together. Be sure the tie is tight so none of the candy canes fall out in their trip home to Mom.
Use festive ribbon to tie around the candy cane bouquet to hide the twist tie. Be sure to help the children wrap the ribbon around the candy cane stems. Tie a bow just below the hooks on the candy cane.
Imagine the look on Mom’s face when those little ones faces present her this wonderful Christmas bouquet. She can place it in a vase to set out for everyone to see and admire all season long.
To Help Busy Mums and Dads Here Are Some Related Shopping Items
When you purchase from this link, you are actually purchasing from Amazon.com, and you can have peace of mind that your order will be processed by Amazon’s secure order server.











New! Comments
Have your say about what you just read! Leave me a comment in the box below.